Shelves for Pictures
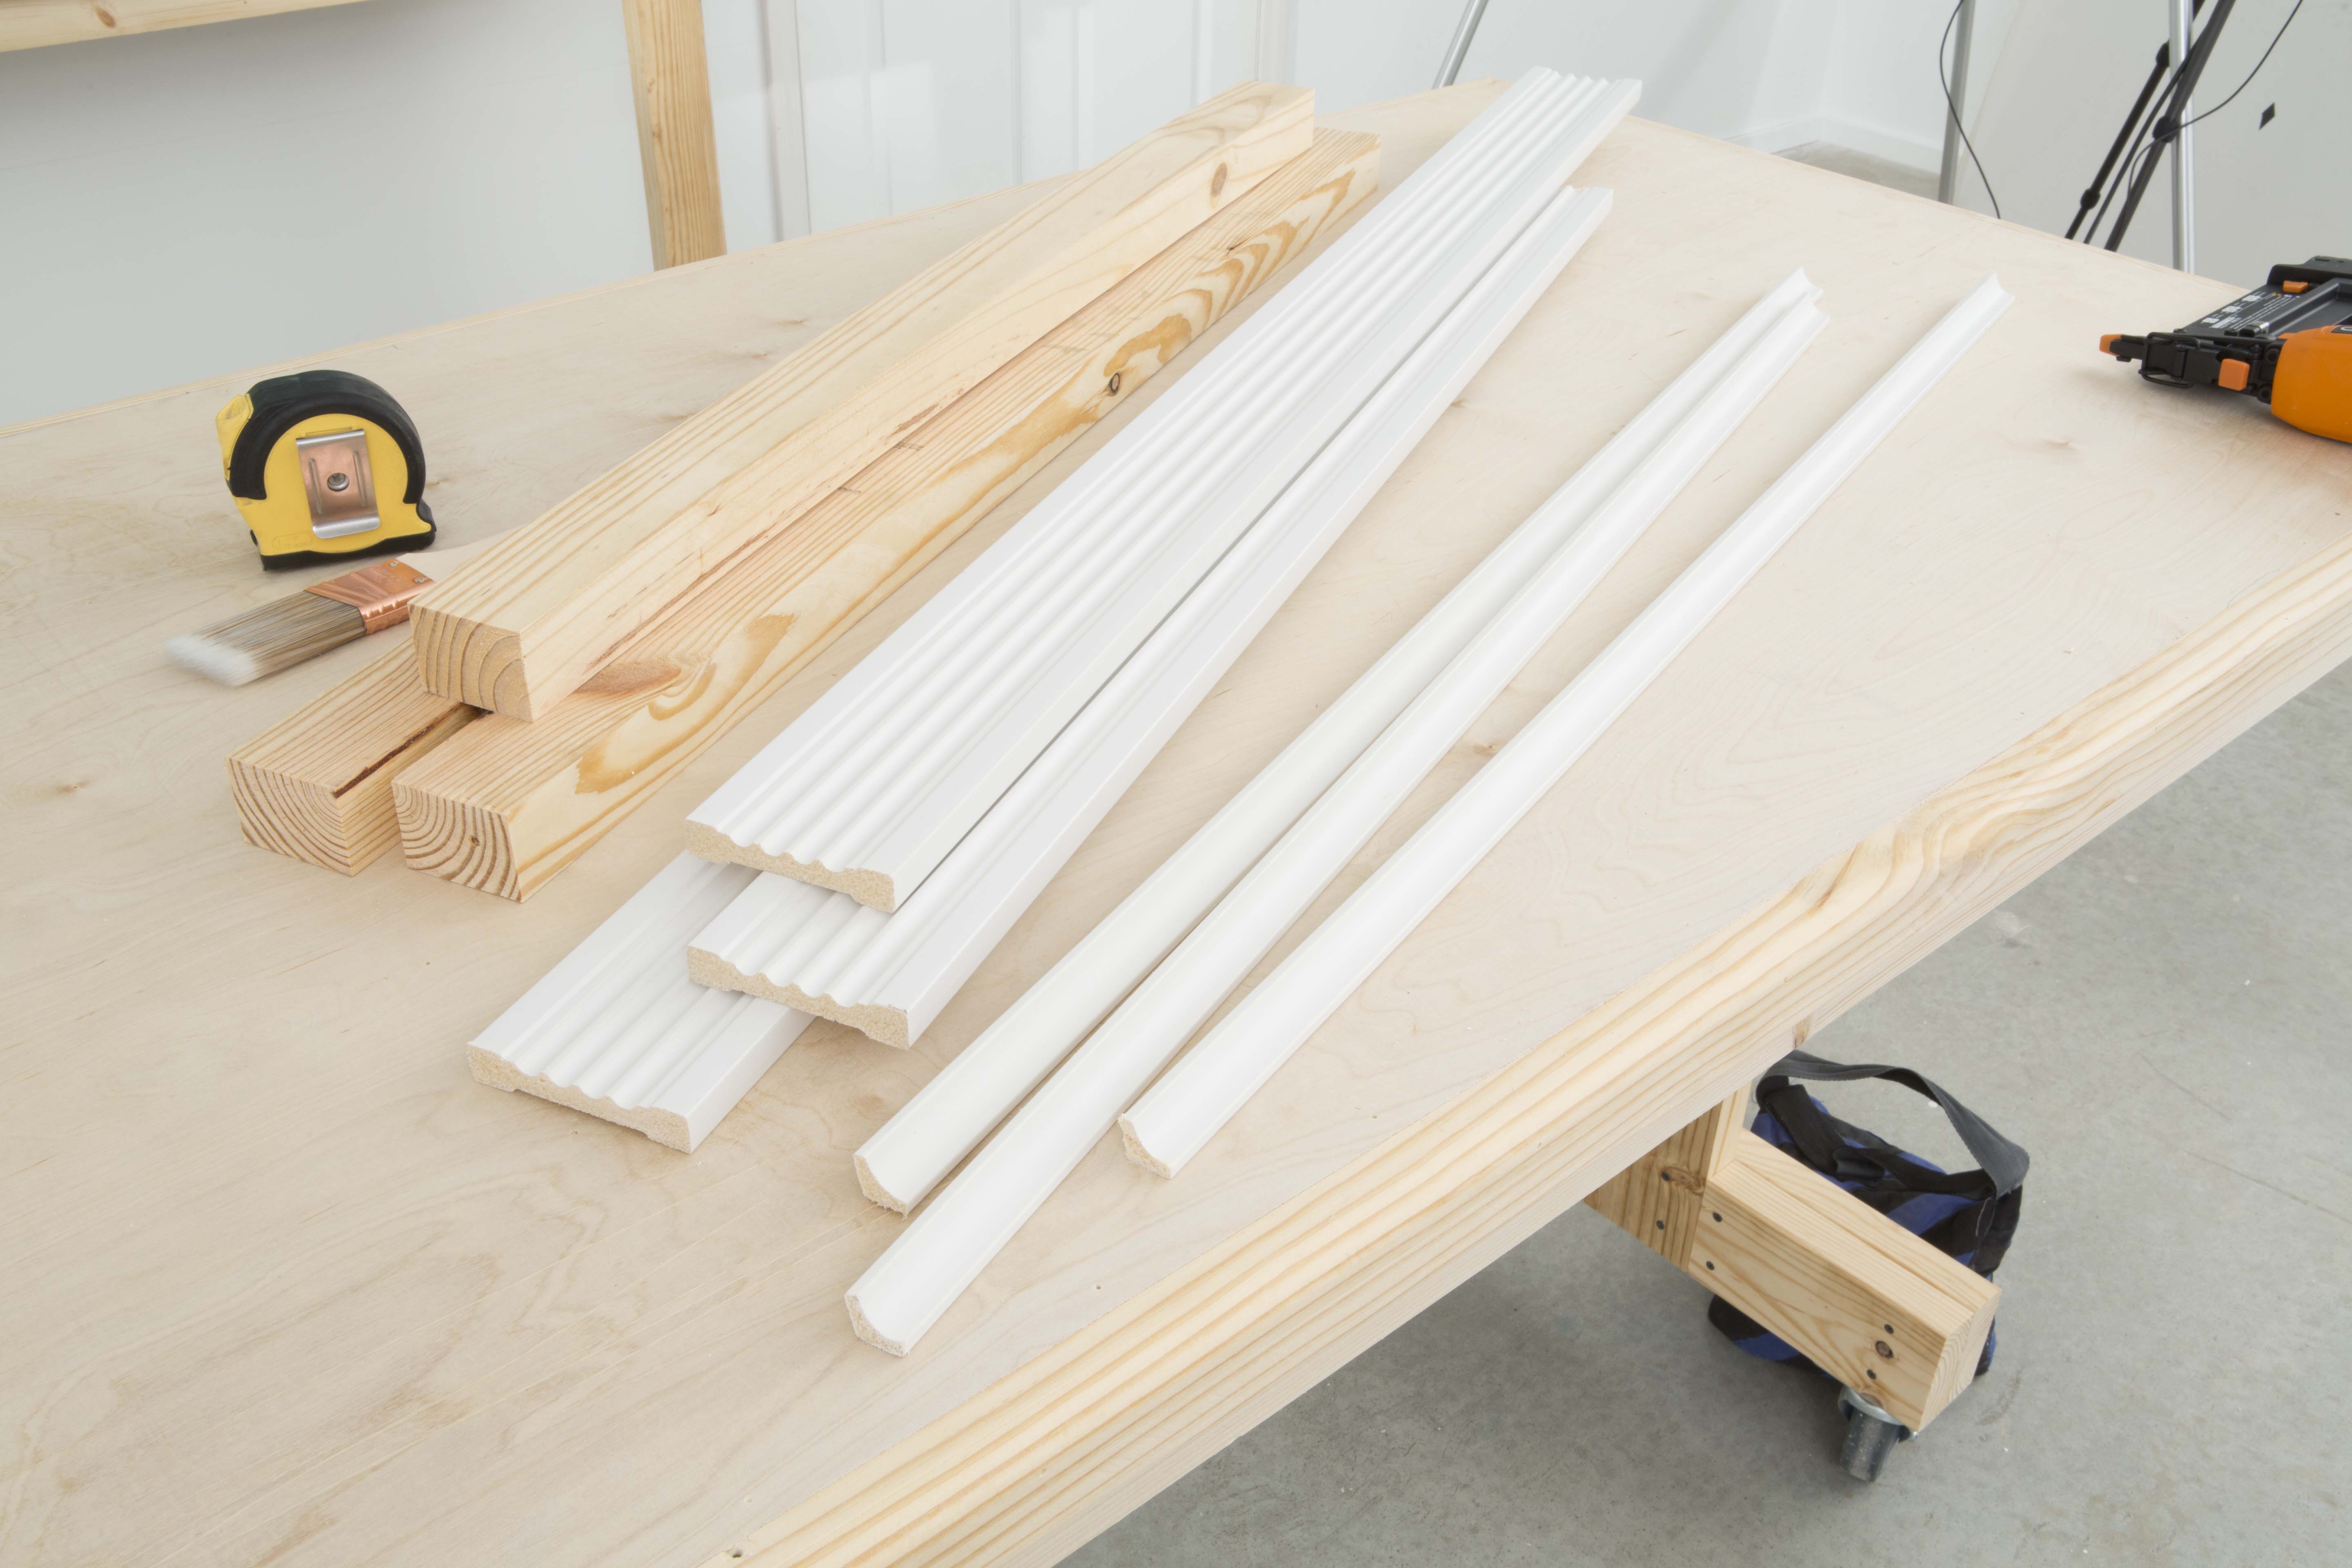
Materials you’ll need
- Fluted Casing 400 Crystal White
- Cove 100 Crystal White
- 2”x2” finished pine wood stock
- Finishing nails
- 3” wood screws
- Shims
- Optional cork material
Getting started
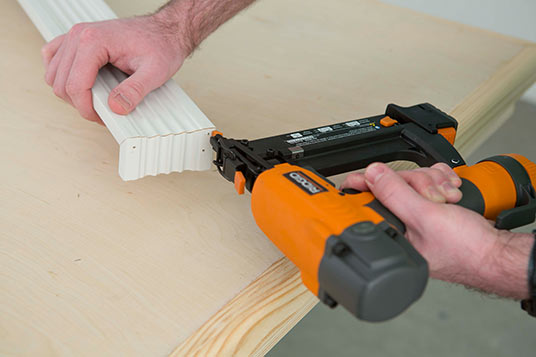
- The key to this project is the fluted casing moulding, which we’ll use for the shelf itself. It’s lightweight, easy to use and has nifty grooves in it to keep photos from sliding off the shelf.
Choose a length of Fluted Casing that fits your space, and miter cut the ends of the shelf at a 45-degree angles.
- Attach mitered 1” pieces of the fluted moulding to each end to give the shelf a finished look.
Cutting & Assemble
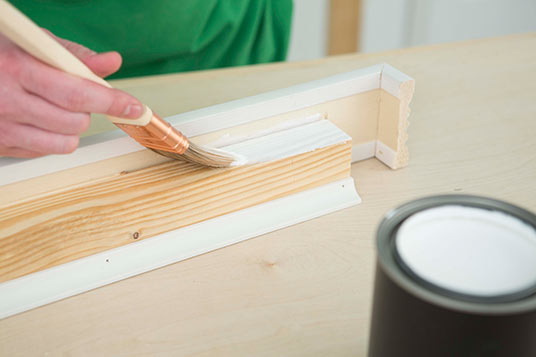
- Cut a piece of 2”x2” wood stock 4” shorter than your shelf, then center the stock under the shelf and attach. You will need to shim the space between the shelf and the 2”x2” wood to keep it level.
- Dress out the shelf by adding a simple Cove moulding to the bottom of the wood stock.
- Drill holes through the wood stock and counter sink for the screw heads that will be used to attach the shelf to the wall. Position the holes so the screws will anchor in the studs in the wall.
Painting
- Screw the shelf onto the wall, fill the holes with spackling putty and paint once the putty has dried.
- If the shelf is in a kid’s room, you can attach a strip of corkboard to the 2”x2” wood face to exhibit your little artist’s latest creations.
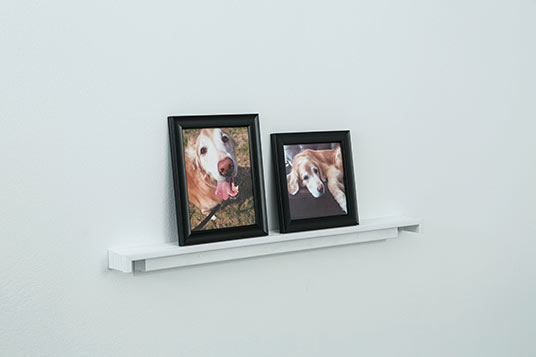
Success!
- Place your pictures on the shelf and change them out often.